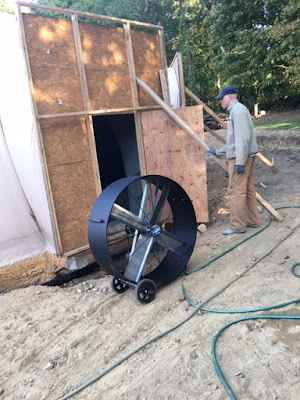
We did rise out of the dirt but unfortunately we are still digging and moving dirt. The last few weeks we have been moving stone. The interior of the house needed to be raised about 6 to 8 inches with crushed stone fill. The first dump truck and a quarter was with wheelbarrows!
Saying it was tiring is a giant understatement. We took the buck off the front door and put ramps down to be able to at least bring the stone from the pile inside the great room. We dumped into wheelbarrows over the tie beam into the kitchen area and were able to directly dump for the great room. The problem we ran into with this method was diesel exhaust. After just a few minutes the air was toxic. Out on a great local store search to find a shop fan we went.
We constantly find ourselves shopping for things we never knew we would need. There is no way to budget for these things and they do add up.
After spending way too much on the biggest fan ever, we were able to tolerate bringing the skid steer back inside.
I definitely have PTSD from my skid steer accident so I am leaving all the ramp driving to Mr. Dometastic. It looks solid in the photo but it is super sketchy in action. Each entry and exit resembles a skid steer rodeo.
Turns out there actually is such a thing as a skid steer rodeo.
For the bedroom wings we cut large openings in the bucks so we could dump into the wheelbarrows through the openings. The skid steer doesn't fit through but the bucket can just barely make it in. This method at least keeps the exhaust outside!
It was a tight fit but it worked. The next step was to compact the stone surface and make it as level as possible using the transit.
It was amazing how much of a difference it makes when the floor is level, uniform and compacted. It is starting to look like a real floor.
After compaction we started installing the vapor barrier and the floor insulation.
The plastic vapor barrier goes down first and is completely sealed around all the risers and seams get taped. Then the insulation goes on over it.
At one point on a late evening I looked over and the kids were in silent protest. LOL
Part of flattening out the interior fill and getting it perfectly level requires level 10 pickaxe skills. The floor around all the augment openings was built up with cement offspray. Some of it is pretty hard stuff. The only way to get it to the correct level is our trusty pickaxe. The great part about it is the ease at which it can break up the cement. But....
The plastic conduit we ran doesn't stand a chance either. OOPS! Found it! This mistake cost us another 1 hour trip out to the orange big box store for another chance to stand on those little X's. At least it was just regular conduit and not the plumbing so no pressure test needed because of a repair.
As part of our underfloor work we installed a passive radon system. This is required by code to be installed in all new construction. It may never need to be hooked up to a fan but it is there just incase it is ever needed. Originally we had it in a bathroom wall but after running all the rough plumbing and everything else we decided to move it to an area with less conduit. We still had to install it under a 1" power conduit but there was nothing else in the area. It will now be located in the back of our walk in pantry. It will no longer be totally hidden but it is also easy to access should we ever need to add a fan to the system.


Our goal now is to finish all the under slab insulation, reinforcement and radiant floor tubing so the floor can be poured before the end of October. I am not sure if we will be able to make our goal. We are still looking for a company to do the floor for us. We have gotten one quote back and it is really high. If all our quotes come back in the same range we may end up pouring the floor ourselves and hoping for the best. Fingers crossed that we can find someone to do it in our price range. The floor may be the thing we have to sacrifice to get back closer to our overall budget. If the floor ends up not nice enough to polish and finish we can always put down other flooring over it. Our one quote so far came back so high we can save well over half the cost by doing it ourselves even with needing to rent all the equipment for a week (including a concrete pump trailer). That is a huge savings that will offset all the other recent overruns. We can't say we look forward to it but we are resigned that our budget may require some sacrifice. Fingers crossed!


Comments
Post a Comment