The house is sealed up (mostly) and we are running a space heater! The past month was the beginning of cold New England weather but we pushed through it. Now we have the house roughly enclosed with the final rough framing and sheathing. This weather is not easy on me. I am not a cold weather lover and only get through it with prolific use of hand and foot warmers. Working outside in the 20's and 30's is painful (I don't DO colder than that at all) and slow when you need to constantly remove your gloves to do things. I was so miserable that Mr. Dometastic bought me heated gloves (I still have to take them off to do things) and I bought myself a pair of snowmobile boots. This was an impulse buy and they are super warm and HUGE! I get to tromp around like an abominable snowman!
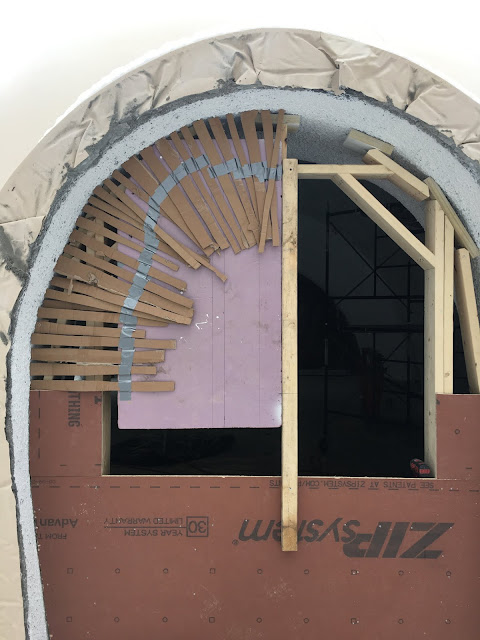
To speed up the process of sealing up the house Mr. Dometastic focused on the framing while I followed along behind trying my hand at sheathing the exterior walls. Mr. Dometastic did the front door and explained how he did all the measuring to get the sheathing to match the irregular curve of the door alcove. I thought it made sense and happily gave it a shot.
Well...after turning several perfect full zip sheathing sheets into little bits of scrap it was clear his method didn't work for me. I decided I needed my own way. I also decided to try out my idea when he wasn't around because I knew he would laugh at me.
He got out of work early and caught me playing with scrap materials, cardboard and tape. He swears that he was laughing in a general "it's just funny" way and NOT in a "your idea is crack pot crazy and will never work way". Not sure there is a difference and the crying while laughing doesn't help his attempt to smooth it over. We often have this happen. I don't know anything about building so I approach problems in a way I do know....as an artist who does have a background in wood and metal sculpture. In his mind this is clearly different than how someone with building experience does things. To match an irregular shape I decided I needed a template that could easily be adjusted taken apart and reused. It may not look like much but six (almost seven) sheathed openings later it clearly works!
It took us a while to mostly seal around the edges and get the whole interior primed. We experienced a catch 22 situation. To caulk and paint the temperature needed to be at least 50 degrees but to get the house heated to 50 we needed to caulk all the gaps. We managed to get a couple of slightly nicer days combined with a borrowed propane heather and mostly succeeded.
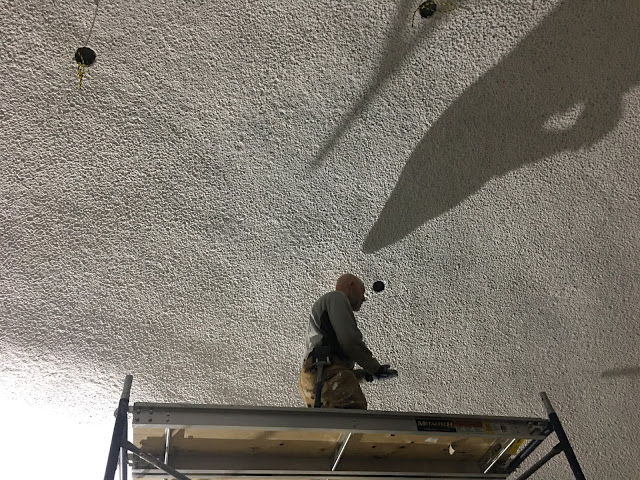
We finished the three coats of primer on the interior. The rough texture combined with the absorbent nature of concrete equals many 5 gallon buckets of primer. We used Kilz 2 and it did cover really well but we decided that heavy primer was cheaper than 2 coats of top coat. We sprayed primer until it was perfectly white.
We just finished painting the final top coat yesterday. The change is not as dramatic this time. It went from a pure cold matte white to a warm semi gloss white.
The pending arrival of our big glass door system made us turn our attention to the framing for the large flat wall. None of our framing for these openings is structural so we are not required to follow all the typical construction rules for framing houses. Our main concern is building walls that will handle the deflection from wind. That said we still bought a 20ft glu-lam beam for over the door system. It was a satisfying install. We called two friends over on Christmas Eve day and the four of us just lifted and slid it right into place. It is sweet when something goes nice and easy when it could have gone very wrong.
This wall is the main feature of the house. One great thing about these domes is you do not need any interior structural supports. None. So you can do whatever you want. We tried to use this as a design feature by leaving the kitchen dome and the great room dome open. You can stand on one side of the house and look all they way to the other without any walls and then look out the big glass wall overlooking the hill.
In our original plans this wall didn't have windows over the door system. It was supposed to be a bunch of scattered glass blocks. After standing in the space a friend told us we were crazy to not put windows above. Even if we can't afford to do it now we should at least frame it in and add the windows later. We started to frame for bigger windows but then changed our mind because the extra height would only give you view of the overhang and drive the cost up. Thankfully this wonky framing will be covered up! We are waiting to get a quote back with fingers crossed. Maybe we can do it now....maybe we can't.
While we worked out our initial heating issues I finished removing all the overspray concrete from the placeholder boxes for our skylights. All 41 are now good to go for whenever we get around to installing them. My wrist and elbow my never be the same from chiseling concrete!
Next I moved on to installing pull ropes (with a little team work for the ceiling ones since a vacuum was needed to get the rope through) in the shell for each of our electrical runs. These are now finished with only the floor ones to go and I began pulling wire. Getting this in place will allow us to move on to insulating the window and door walls.
Lastly a quick update on our super cool iron doors that we managed to royally screw up the order on. Our big front door is just sitting at the factory waiting for the back door to be made in the correct size this time. The company is holding the big one back to ship both together in February. This saves us about $300 in shipping costs so it seamed like a good trade off. Our other windows aren't due until the beginning of February as well. We have plenty to do before they arrive. Next up on the big project list is to polish the concrete floors and insulate the newly framed walls. We are currently looking into machine rentals for the floors.


Comments
Post a Comment