Before I get into the details of how and why lets take a second to appreciate that we actually pulled off yet another diy project with absolutely zero experience. Then we can go into what went wrong and how it could have been better and show our process.
These first photos show the countertop after it as been sealed just prior to moving in.
If you would like to see a video walk through right before we started moving in click HERE. I show the countertop at the 2 min mark. This was a huge project for us and we pretty much dove into the ocean head first. This means mistakes were made, we had to be flexible in our expectations and we had to trouble shoot as we went. We were also doing this project under pressure to finish so we would meet our move in deadline. Not the best way to learn a new skill.
Let me say first that I like how they came out, but they are not quite what we planned and I would do it differently if we could magically start over. I think we learned a lot and for a first attempt at a diy concrete counter. I just wish we had been able to start with a small one to work out the best techniques. We had to start with the large kitchen one because of our push for a CO. The sticking point was not the sink but the electrical behind all the kitchen cabinets and outlets built into the counter top back splash. We had to do that big countertop first because final kitchen electrical was holding up our CO.
After living with them for 8 months I think they are great. They are easy to clean, don't stain, are heat tolerant, and food safe. We sealed with an organic sealer (tung oil) and then a food safe countertop wax that is a mix of beeswax and mineral oil. I have reapplied the wax once in the 8 months just to keep it fresh. We put 5 or 6 coats of tung oil on to fully saturate the concrete (it soaks in unlike many other sealers that are surface only) . You keep applying coats until it no longer accepts more. It then cures like a resin and the entire counter is essentially one big uniform oil stain that resists water or anything else. We have not had any issues with staining that we have heard is typically an issue with concrete. Sometimes a puddle of water will leave a water mark for a bit until it dries but it does not stay as a mark. Tung oil does darken your concrete (like other oil based sealers) and give it a slightly warmer tone because it is an oil and is a dark honey color. If you don't know about tung oil I suggest you check it out. It is an old school sealer for stone and wood that is not a harsh chemical even when wet. It is a plant based oil that will "cure" into a dry resin after it is absorbed. It has a pleasant kinda nutty smell when it is applied.
We went with concrete because we needed to follow the irregular curves of the dome. It is possible to have done other counter materials but they also have their disadvantages and came with a much higher price tag with the exception of maybe poured epoxy. We really didn't want chemicals where we would be preparing food so we avoided even the chemical sealers.
Overall, I think we did a pretty good job but there are several things we did wrong or that were problems we need to keep in mind as we do more countertops in the house.
- Mr. Dometastic mis read the concrete mix and thought the fibers were already in the mix because it was specifically concrete for countertops. Our countertop still has wire mesh but no fibers so we have gotten a few hairline cracks.
- We seeded copper chips into the surface and I spread them too thick/too close together in a few spots (they pushed together a bit when the concrete was still wet) and created divots when they came out during polishing. We stopped polishing before we originally planned because we were worried more would come out. The result is a honed but not real shiny counter.
- We ended up with quite a few air bubbles on the edges even though we very diligently vibrated it. We chose to leave them except for a few that were in the backsplash that were bigger. We have decided to embrace the "industrial vibe" and not stress the little things. If you need things to be perfect... hire a company to do it.
- There are marks from our forms that were too difficult to grind out with the tools we had and we couldn't get into the corners. We again have decided to embrace the "industrial vibe".
- My copper chips still oxidize over time even with the tung oil and wax. This wouldn't be a problem if we had sealed with some sort of surface epoxy or acrylic commercial sealer. They do buff back to bright and shiny but it requires occasional work. I think it is a trade off. Zero work and chemicals on the counter or some occasional (once every few months) cleaning needed and no chemicals. I would still choose no chemicals but this comes with some maintenance needs.
Now for the in process photos/video for those of you curious about how we did our form work. We did it in two stages. First stage was for the flat work surface. Second stage was for the curb style backsplash with embedded outlets and switches. This counter is extra deep because of the curve of the exterior so we decided to have the outlets and switches in a curb that would bring them a little further out.
Stage 1 - Counter top
In my post
"The Push for a CO" you can see our cabinet installation and how we delt with installing along the curve of the dome exterior. This also made our countertop very deep. I am posting photos of each stage of our countertop installation and including videos as well if you would like a more comprehensive look at our diy process that may or may not be the correct way of doing things!

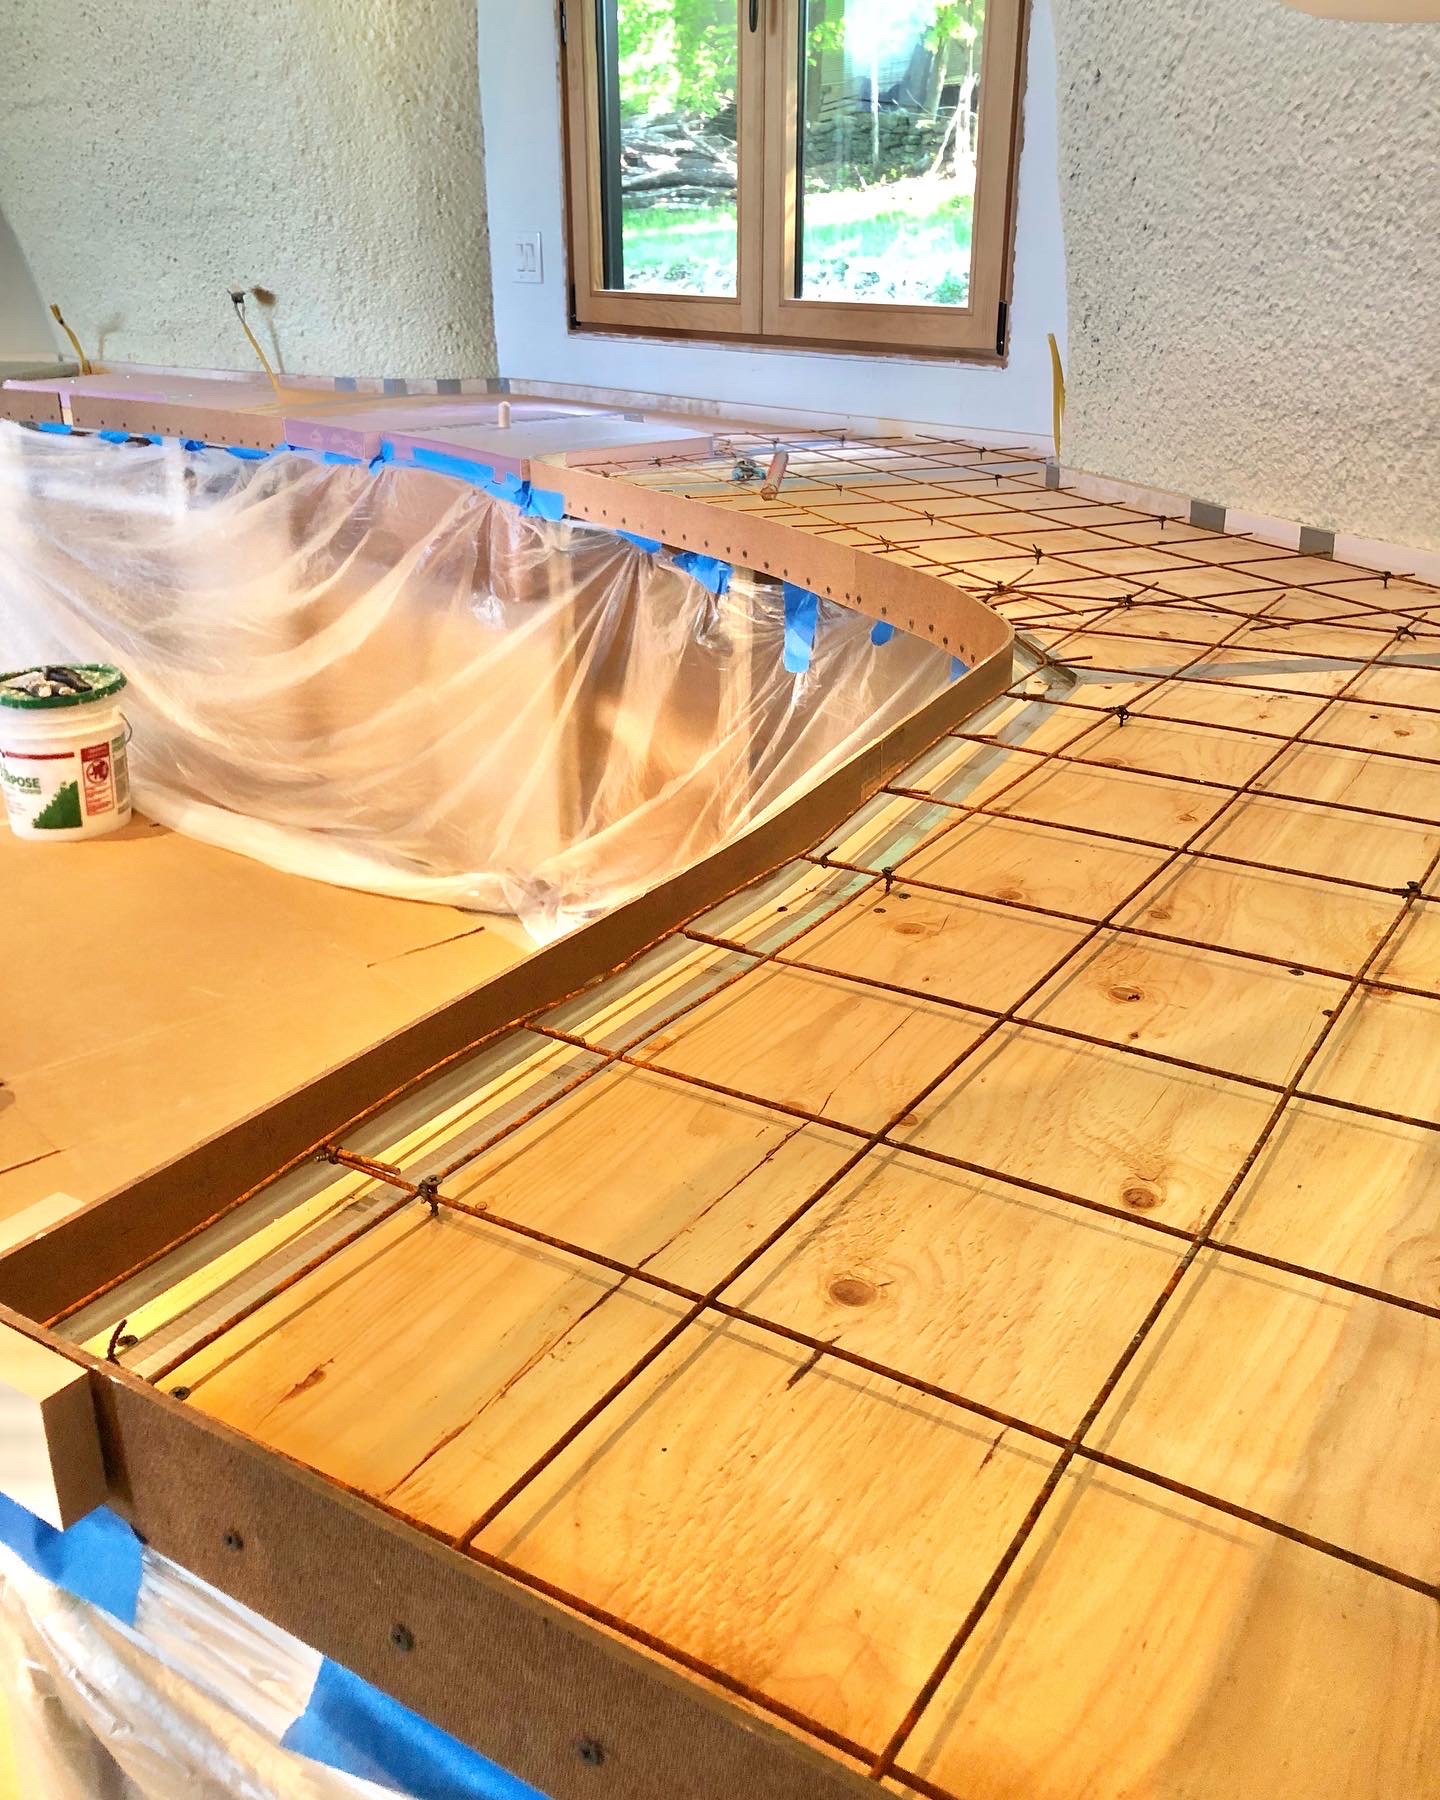
1/2" plywood base with all seams taped
Wire mesh offset from the plywood using screws and rebar ties to hold it up off the bottom. Masonite edge to create our curves. We taped seams with packing tape. These packing tape edges did show up in the finished countertop as a smoother area. Every small line and material change does show up when forms are removed. Click HERE to watch a video showing the forms. We used AZEK board along the back edge of the form as a screed guide and foam board for all our cut out areas for the stove, sink and cutting board. The AZEK gets covered up in stage 2. We used either Duct tape or packing tape on the foam edges. Duct tape worked better. Be careful to not get wrinkles and keep smooth. We used caulk to seal edges to make a nicer transition. We also used spray canola oil as form release. Do not skip using plastic sheets and floor covering to protect cabinets etc. It makes a huge mess.
We used a rental drum mixer and moved the concrete using 5 gallon buckets. We set up just outside the door with power and water. Filled the bucket to a manageable level and used dollies to push the bucket to the countertop. It is very heavy work.
It would be very difficult if not impossible to do this alone. We had 3 people and were rushing to stay ahead of the concrete curing even with a plasticizer to help slow down the cure. Click HERE to watch a video of just after pouring. Click
HERE to watch a video of just prior to removing the forms. Mr. Dometastic didn't know I had taken video of the forms before we poured.

Forms are off and concrete is still curing. The canola cooking spray worked great.
Closeup of copper chips seeded in curing concrete. I spread them in "veins" but put them in too thick causing a problem when polishing.
Testing out how our built in cutting board will fit after the forms came off.
Stage 2 - Backsplash
Getting ready for step two of our countertop pour. Curb style backsplash forms.
We used masonite again and used fiberglass lath mesh in the curb.
Click HERE to watch a video showing the backsplash forms. Detail showing inside the curb form. Electrical boxes and flexible conduit to house our countertop outlets and switches. The boxes were screwed and caulked to the masonite to try to keep concrete out during the pour. The lath has not been added yet. We pushed it in during the pour.Wet concrete. You can see the step down on the right where the curb goes under the window.
All the bracing made vibrating the curb difficult. As a result we had some larger bubbles to fill after forms came off.
Forms come off, large bubbles are filled. Be ready for your project to be messy!
After sweeping and scraping all the loose debris after the forms are mostly off.
The use of packing tape on the masonite seams was really noticeable on the backsplash. The texture of the concrete is much smoother (glass like) and we were unable to remove the marks completely with the equipment we had.
Polishing started. We bought a universal dust shield (green device) and jury rigged it onto our electric buffer that we use with polishing pads. We tried wet polishing but it wasn't working. I go into more detail in the video.
Solution to a problem. I seeded the copper chips in too thick and they began to pull out during polishing. The resulting divots were very light in color and looked horrible. So I made a last minute decision to stain in some dark "veins" around the copper chip areas. This helped to hide the areas that were divots. Click
HERE to watch a video with more detail about this stage.
To complement the copper chips I used navy blue and some black knowing that the overall counter would be much darker in the end once sealed. The contrast between stain and not stained is significantly removed once sealed. More polishing still needed but we moved on to high polishing grits to avoid pulling out more copper. At this point the concrete was treated with a densifier,
Euco Diamond Hard .
Finished polishing and ready to start applying the Tung oil. You can see some of the divots in this photo where the copper pulled out during polishing. Click
HERE to see a video where we are most of the way done with the countertop. Some info does overlap the previous video.
As you can see the concrete had many variations in color. Some of that is our limitations polishing with our hand held machine. We are not able to get into corners or along edges as well as someone with a professional machine. We also could not get the color difference in the concrete to go away where we had taped seams on the backsplash forms. I think if we had a much harsher grinder it could be done but the amount of time and arm strength needed made it impossible to do diy without damaging the flat countertop surface. The buffer would catch and bounce off the flat with its edge leaving marks. I am sure professionals have some sort of corner/edge machine.
We learned a lot during this project and will be doing more concrete counters. We still have the kitchen island, the master bath and the half bath to do as we continue with our construction.


Comments
Post a Comment